We promised to protect you from cumbersome configuration and installation work. Therefore, you can find below a link which starts the cloud IDE Codenvy for you[1]. The IDE already contains a project with the sample application that we want to use in our tutorial.
Start Cloud IDE
2.1 Running the Application
To start the application server[2], we’ll click on the ‘Run‘ submenu you’ll find under the main menu ‘Run’. In the console log in the bottom part of the screen you will see the log entries of the server. After starting up our server the cloud IDE will deploy our application, which consists of an empty WAR file[3] (short for web archive) for the time being.
After the deployment in the console log, you will find a blue colored link labeled with “Application:” as shown in Figure 2-1. Press this link to start the deployed application[4]. Please memorize this procedure as you’ll repeat it a lot of times throughout this book.
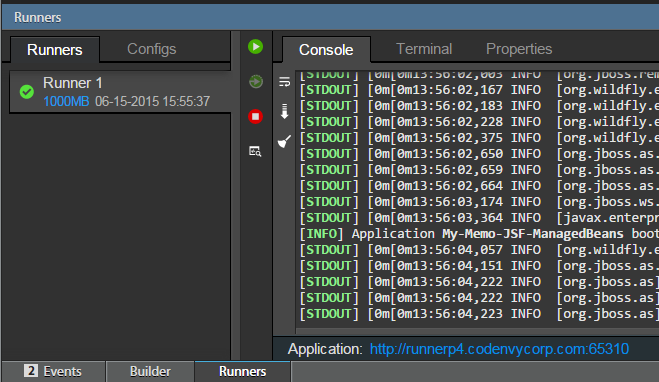
Fig. 2-1 Screenshot of the application starting link.
After clicking on the link the browser should display the screen shown in Figure 2-2. Congratulations, you managed to start the sample application. Take so time to click through the application before continuing with the real development.
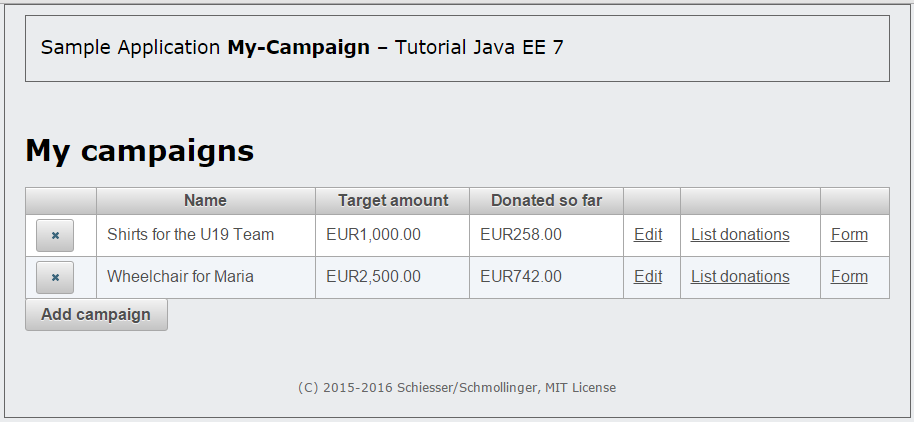
Fig. 2-2 List of campaigns – Start screen of the sample application.
2.2 Structure of the Sample Application
Before we continue changing the sample application, we want to to understand firstly a few things about the existing project state.
If you browse the project with the project explorer you can see a lean directory structure (see Tab. 2-1).
| Directory | Description |
| src\main\java | Contains the package structure and the corresponding Java classes. |
| src\main\webapp | Contains all views and stylesheets concerning the web layer of the application. |
| src\main\webapp\WEB-INF | Contains configuration files. |
| src\main\resources | Contains the language dependent message bundles. |
Tab. 2-1 Directory structure of the initial Maven project.
This is the standard structure of the build manager Maven[5] that we are using for our project.
To simplify the start for you, the project already contains a sample application written in JavaServer Faces (JSF). If you haven’t done so, please read the requirements of the sample application before you continue to get a better understanding. Also, if you haven’t heard anything about JSF yet, we recommend to read the JSF chapter of our book Java EE in a Day – trust us, it’s worth it.
In this tutorial we will modify and add the Java classes of this project. Therefore before we start, we want to get a closer look at the files under the src\main\java folder.
There you find the main application package press.turngeek.mycampaign with the three sub packages controller, data and model. Controller and Model are concepts from the MVC (Model-View-Controller) pattern that you are probably familiar with.
Let’s have a look at the model package first. It contains the classes Account, Campaign and Donation. These are simple POJO classes according to the specification of the domain model.
As the name suggests, the controller package is containing the Controller classes. Their purpose is to receive events from the web views and to update the model data if a state change is necessary. Views are not directly modifying the model – this is always done via controllers. Generally speaking, for each use case their exists one controller class.
Lastly, the data package contains the classes CampaignProducer and CampaignListProducer. Their purpose is to provide us with concrete instances of the model classes. The CampaignProducer provides us the campaign that was selected by the user, whereas the CampaignListProducer provides us with the list of all available campaigns for the user.
2.3 Criticising the structure
Our application does contain some good examples of unwanted couplings, one of these being that the EditCampaignController in the doSave method directly accesses the list of Campaign objects belonging to the CampaignListProducer.
Here, it would be preferable to introduce a loose coupling between the two components. In this particular case, the doSave method could send a message to the CampaignListProducer that a Campaign object should be added. The CampaignListProducer could then decide how to respond to this message for itself. If another, yet-to-be-developed component wishes to respond to this message at a later date, it can do so without any modification of the existing sending components.
This safeguards the future extensibility and maintainability of the application. In practice, large applications contain hundreds such examples that could be more easily and elegantly solved with CDI. In the following chapters we will work through to improve the structure of the application. If you think these are minor things, keep in mind that real applications consists of hundreds of use cases – imagine that our application is one of these.
Discussion
Use the message board below to give the authors your feedback or to discuss this page’s topic with other readers (in English please!). Please don’t expect the authors to answer directly, but they might update the content of this site according to your feedback.
- As you might have guessed, all the changes you are doing in the cloud IDE are volatile and will be lost after closing the browser. If you want, you can sign up to Codenvy which allows you to persist the project in your own dedicated workspace. If you don't want to sign up, don't worry: throughout the book we provide links that allow you to start an IDE in the needed state. ↵
- we configured the project in the way that WildFly 8.2.0 is used as our application server. In general, it is possible to configure arbitrary execution environments in Codenvy since Docker is used internally. We decided to use WildFly because of its high practical relevance. ↵
- We're linking here to the old Java EE 6 tutorial as we think the explanation for WAR files is better there than in the newer Java EE 7 tutorial ↵
- Be careful, sometimes the link appears before the application is deployed to the server. ↵
- Maven is a technology that supports the creation and deployment of Java EE applications on various application servers and allows them to be integrated in virtually any IDE. Maven is a general configuration management tool for all Java-based projects and for Java EE projects in particular. ↵