In this chapter, we get in touch with the most current web client technology of Java EE, namely JavaServer Faces (JSF). Before we start, please verify again that your project is accessible in Codenvy and is up to date, i.e. you finished the previous chapters successfully as described. If this is not the case you can follow the preceding factory link that generates a project environment for you[1].
Project after Chapter 4 (JSP)
JSF is a framework for building web applications that are realized on the following building blocks:
- Separation of concerns: the Model-View-Controller (MVC) pattern is an integral part of JSF. Views are defined using a view declaration language (XHTML files called Facelets). Controllers are realized by Java classes that bind to UI controls using the JSF Expression Language similar to the JSP Expression Language explained earlier. At runtime, we talk about controller beans that are managed by the application server. The model is realized by POJOs (Plain Old Java Objects) that reside within the controller beans at runtime. Their attributes can be bound to UI controls within the view declaration.
- UI components: views consist of UI components that have a markup language representation usable in the declaration of a view. UI components are realized by Java classes of the JSF-API. At runtime, a view is a tree of nested Java objects (components tree) built from the view declaration and rendered, on request, into HTML and JavaScript for the browser. UI components are either UI controls like buttons or text fields, UI structures like tables or grids or provide special functions like validation or conversion of input data.
- Event handling: JSF provides an event handling system similar to well known desktop application frameworks like Java FX or Swing. Therefore, it is possible to register methods of controller beans as listeners for UI components.
5.1 JSF Activation
In general, it is necessary to activate JSF in your web application, explicitly. By that the so calledFacesServlet handles Faces requests. Any easy way to activate JSF is to add the configuration file faces-config.xml as shown in Listing 5-1 to the WEB-INF folder in our src/main/webapp directory.
<?xml version="1.0" encoding="UTF-8"?>
<faces-config version="2.2" xmlns="http://xmlns.jcp.org/xml/ns/javaee"
	xmlns:xsi="http://www.w3.org/2001/XMLSchema-instance"
	xsi:schemaLocation="http://xmlns.jcp.org/xml/ns/javaee http://xmlns.jcp.org/xml/ns/javaee/web-facesconfig_2_2.xsd">
	<application>
	</application>
</faces-config>
Listing 5-1 Configuration file
faces-config.xml
Of course JSF activation is not the only reason for this configuration file. In more complex projects it is needed for other reasons, like e.g. I18N or view navigation. Nevertheless, in our small application, we don't need further configurations.
5.2 JSF Facelets
Let's start with the view of our application! Facelets are XHTML files describing a view of a JSF application. First, we create a simple Facelet in order to show its general structure. Please, save the filememos.xhtml as depicted in Listing 5-2 in src/main/webapp[2].
<!DOCTYPE html>
<html xmlns="http://www.w3.org/1999/xhtml"
	xmlns:h="http://xmlns.jcp.org/jsf/html">
<h:head>
	<title>My-Memo</title>
	<meta charset="utf-8" />
        <link rel="stylesheet" type="text/css" href="screen.css"/>
</h:head>
<h:body>
	<div id="container">
		<div id="header">
			<p><b>My-Memo</b> - A Simple Web App for Managing Memos</p>
		</div>
		<div id="content">
			Hello World!
		</div>
		<div id="footer">
			<p> (C) 2015 Schiesser/Schmollinger, MIT license</p>
		</div>
	</div>
</h:body>
</html>
Listing 5-2 Facelet memos.xhtml
Looking at Listing 5.2, we realize that the structure is very similar to that of our pure HTML5 file in chapter 1. The main difference is the HTML tag that introduces a namespace for HTML-like JSF UI components (http://xmlns.jcp.org/jsf/html) and the usage of two of them (h:head and h:body). All these tags are rendered to pure HTML at the end of the request processing on the server.
Before we are going to test our first facelet, we realize an easy entry in our application by changing our index.html file currently stored in the directory src/main/webapp according to in Listing 5-3. This realizes a forwarding to our facelet. After the change, e. g. something like http://runner20.codenvycorp.com:64433 is automatically forwarded to http://runner20.codenvycorp.com:64433/memos.jsf.
<!DOCTYPE html>
<html>
<meta http-equiv="refresh" content="0; URL=memos.jsf">
</html>
Listing. 5-3 HTML file index.html Step by step, we clean up our project. Please delete the file
src/main/webapp/WEB-INF/memos.jsp, we don't need it anymore. After saving or deleting the files, we can re-run our project and after a click on the provided link (e.g. http://runner20.codenvycorp.com:64433) we should get the content presented in Fig. 5-1.
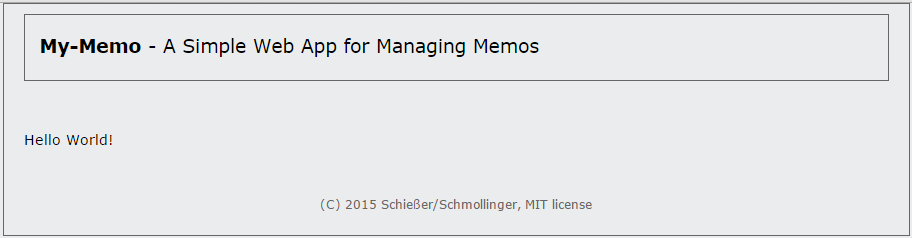 Fig. 5-1 Screenshot of the JSF-rendered "Hello World!" view in the browser.
5.3 JSF Managed Bean
Before we start extending our user interface with JSF components, we explain the way controller logic is realized in our JSF application. In chapter 4, ourMemoServlet received the http request and dispatched it to one of its controller methods. JSF works in the same way, but the developer is not responsible for the dispatching anymore. The handling of a request is managed by the previously mentioned FacesServlet. It manages the whole lifecycle of a JSF request and also calls the respective controller methods for a certain user interaction. For the moment this is enough to know about the JSF lifecycle, but if you want to become a JSF expert, you have to learn more about it (e.g. by reading the specification). Since we won't need our MemoServlet anymore, we can delete it now.
Controller methods are provided by classes that are instantiated and managed by the application server at runtime. Therefore, objects at runtime (and even sometime classes) are called Managed Beans. In a first approach, we create a bean class that stores our memos in a list similar to the former MemoServlet and provides two controller methods, one for the button to add a new memo and one for the button to reset the list of memos. JSF defines two kinds of controller methods, action and action listener methods.
Action Method or Action Listener Method?
Action methods are generally used in situations where we want to influence navigation. To be able to do this, the return value of an action method must contain the name of the subsequent view. Action listener methods, in contrast, offer easy access to the action event and thus to the component that triggers the event. The application does not navigate to another view, but the content of the current view may be manipulated by the listener method.
In Listing 5-3, we use two action listener methods, since we have only one view in our application and, therefore, need no navigation to other views. Further, the controller class contains a getter method for accessing the list of memos and a getter and a setter method for the current memo the user works on. These access methods are necessary for the data binding with the UI controller components. Please save the class in Listing 5-4 as MemoController.java in the given package (press.turngeek.mymemo.controller) in the folder src/main/java.
package press.turngeek.mymemo.controller;

import java.util.Date;
import java.util.List;
import java.util.LinkedList;

import javax.faces.bean.ManagedBean;
import javax.faces.bean.SessionScoped;

import javax.faces.event.ActionEvent;

import press.turngeek.mymemo.model.Memo;

@SessionScoped
@ManagedBean(name = "memoController")
public class MemoController {

    private Memo memo;
    private List<Memo> memos;

    public MemoController() {
	memos = new LinkedList<>();
	memo = new Memo();
    }

    public Memo getMemo() {
        return memo;
    }

    public void setMemo(Memo memo) {
        this.memo = memo;
    }

    public void doAdd(ActionEvent event) {
        Memo newMemo = new Memo();
        newMemo.setDescription(memo.getDescription());
        newMemo.setCreated(new Date());
        memos.add(newMemo);
        memo.setDescription("");
    }

    public void doReset(ActionEvent event) {
        memos.clear();
    }

    public List<Memo> getMemos() {
        return memos;
    }
}
Listing 5-4 MemoController class
Looking at Listing 5-4, we realize some new concepts that come with JSF Managed Beans. First, the class is annotated with @ManagedBean (package javax.faces.bean). Doing so the application server recognizes that the class can be used as a Managed Bean. Without this explicit definition, the server would ignore the class and would not initiate beans at runtime. In addition, the annotation allows to define a name for the beans by using the annotations's attribute name. We used the class name beginning with a lower case letter (memoController), which is a convention in this context. We'll need the name later on for binding the bean's attributes and controller methods to UI components.
Additionally, we used a second annotation at the class level called @SessionScoped (package javax.faces.bean). So far, we have explained that the application server manages the life-cycle of the Managed Beans. The question is, how long does the server provide the same instance, that means how long is the data stored working with the application. In the previous chapters, we stored the data in the servlets session context. The same can be achieved for the life time of Managed Beans by using @SessionScoped. In this case, the application server asserts that during a session a user always works with the same bean instance and, therefore, the data of the bean is available as long as the session is valid. Be aware that bean classes annotated with @SessionScoped also must implement java.io.Serializable, since sessions may live a long time and a server must be able to persist session data. This is not the only scope provided by JSF Managed Beans. At the end of this chapter, we' ll get in touch with some alternatives.
The last new thing we recognize in Listing 5-3 is the use of the type ActionEvent (package javax.faces.event) in the parameter list of the bean's action listener methods. While interacting with a JSF view, users work with UI components and by that produce events. Action listener methods, as well as action methods, can be registered to the firing components and are executed if the respective event occurs. E.g. by clicking a button, an action event is produced and automatically passed to the registered action listener method. The class ActionEvent provides information about the action itself, e.g. about the component that produced the event, which can be useful in implementing the method. In our case, we don't use the passed argument, since we don't need special information about the event in order to realize the method. Action events are fired by clicking on buttons or links
[3].
5.4 Improve the Facelet
Now it is time to enrich our Facelet with the necessary UI controls and bind them to the corresponding methods of our bean using the JSF expression language (EL). Analogously to the expression language in JSP (chapter 4), the JSF expression language is the relating link between text-based Facelets and JSF Managed Beans. With the help of expressions, we can register bean methods with action components (e.g. buttons) or bean properties with value components (e.g. textfields). The syntax is the same as for the JSP expression language with the exception that an expression starts with a hash tag (#{...}) instead of a dollar sign (${...}). Since JSP 2.1 and JSF 1.1 the formerly divided languages have been unified. The resulting language is called Unified Expression Language (UEL). That means, the different starting signs are just a relict of a historic development. Both variants would work well.
As defined in earlier chapters, we need a form with command buttons to submit the form, either for adding a memo or for resetting the list of memos. Further, we need a textfield to enter a new memo. And finally, we need a data table to present all saved memos. If currently no memo is in the list, we just want to put that message in the page instead of the empty table. The latter can be done by a component called <h:outputText>. Please update your Facelet memo.xhtml as described in Listing 5-5. We'll explain the new components further down.
<!DOCTYPE html>
<html xmlns="http://www.w3.org/1999/xhtml"
	xmlns:h="http://xmlns.jcp.org/jsf/html"
        xmlns:f="http://xmlns.jcp.org/jsf/core">
<h:head>
	<title>My-Memo</title>
	<meta charset="utf-8" />
  <link rel="stylesheet" type="text/css" href="screen.css"/>
</h:head>
<h:body>
	<div id="container">
		<div id="header">
			<p><b>My-Memo</b> - A Simple Web App for Managing Memos</p>
		</div>
		<div id="content">
			<h:form>
				<h1>Add Memo:</h1>

				<h:inputText id="memo" size="30" value="#{memoController.memo.description}"/>

				<h:commandButton value="Add"
					actionListener="#{memoController.doAdd}" />

				<h1>My Memos:</h1>

				<h:dataTable value="#{memoController.memos}" rendered="#{!empty memoController.memos}" var="memo">
					<h:column>
                 <f:facet name="header">Memo</f:facet>
						<h:outputText value="#{memo.description}" />
					</h:column>
					<h:column>
                 <f:facet name="header">Saved</f:facet>
						<h:outputText value="#{memo.created}" />
					</h:column>
				</h:dataTable>
            <h:outputText value="Please add some memos." rendered="#{empty memoController.memos}"/>
				<h:commandButton value="Reset list" immediate="true" rendered="#{!empty memoController.memos}"
					actionListener="#{memoController.doReset}" />
			</h:form>
		</div>
		<div id="footer">
			<p> (C) 2015 Schiesser/Schmollinger, MIT license</p>
		</div>
	</div>
</h:body>
</html>
Listing 5-5 Facelet memo.xhtml.
Form Component
To be able to enter data and submit it to the server, we will need a form. Using the <h:form> tag in a Facelet, JSF can create an HTML form into which UI components can be embedded as desired. For our input screen, a single form beginning with <h:form> and ending with </h:form> will suffice.
<h:form> in a nutshell
This tag is rendered to an HTML form that submits its data via an HTTP POST. A form must contain at least one component that is capable of triggering a Faces request (e.g. <h:commandButton> or <h:commandLink>, as you will see below).
Selected attributes:
acceptcharset: gives a list of character sets accepted by the server for the input data of a form, e.g. <h:form acceptcharset="ISO-8859-1">
<h:commandButton> behaves like a button that triggers an Action Event when clicked by the user.
<h:commandButton> in a nutshell
In a form, these tags are rendered to a button that starts an HTTP POST request by default when clicked.
Selected attributes:
value: Labeling a link or button
action: EL expression for binding an action method of a bean
actionListener: EL expression for binding an actionListener method of a bean
<h:dataTable> tag allows us to represent data in tabular form. The entire structure is rendered to HTML for the browser using the HTML tag <table>. The columns of the table are defined using the tag <h:column>. The tag <f:facet> is used to insert headers and footers.
<h:dataTable>, <h:column>, <f:facet> in a nutshell
We use these components to display lists of identical objects in tabular form.
<h:dataTable>
The outer tag of the data table
Selected attributes:
value: Data to be displayed. This generally takes the form of an EL expression that references an attribute of a bean containing a collection of objects.
var: Name of the variables that represent the data object of a row. The variable can be used in EL expressions.
rendered: Contains an EL expression that evaluates to a boolean. If the result is true, the table is rendered otherwise not.
<h:column>
Represents a column in the data table and is therefore used within <h:dataTable>. The number of successive <h:column> tags determines the number of columns per row of the table.
<f:facet>
Caption for enclosing elements. <f:facet> can be used within a <h:column> tag to specify a header or footer for the column.
Selected attributes:
name: Type of labelling (header/footer/caption). Determines whether the label is a header or a footer.
<h:dataTable> tag using the attribute value. Currently, we access the Memo objects stored in the memoController bean using an EL expression. Accordingly, the table contains a list of memos. Each memo is represented as a row in the table. Access to the individual memos is achieved using a special variable. The <h:dataTable> tag uses the attribute var to introduce a variable named memo of type Memo. The variable corresponds to a control variable in a loop and represents the current memo when processing the list. These variables can be used to access the properties of a memo for each row.
Labels for columns and tables can be inserted using the <f:facet> tag. Possible facets are header, footer and caption (for the table name). We want to create the column headers, so we use the <f:facet> tag within the <h:column> tag and set the name attribute’s value to header. Be careful, before we can use this tag, we have to include the namespace for the corrsponding JSF core library in the Facelet (http://xmlns.jcp.org/jsf/core).
Output Text Component
The tag <h:outputText> can be used to embed text in the page.
<h:outputText> in a nutshell
This tag adds text to the page to be created.
id: Unique name of the text component
value: Text or EL expression for binding a bean attribute or method to the component
rendered: Contains an EL expression that evaluates to a boolean. If the result is true, the text is rendered otherwise not.
http://runner20.codenvycorp.com:64433). By entering some memos, you should get a view similar to that presented in Fig. 5-2.
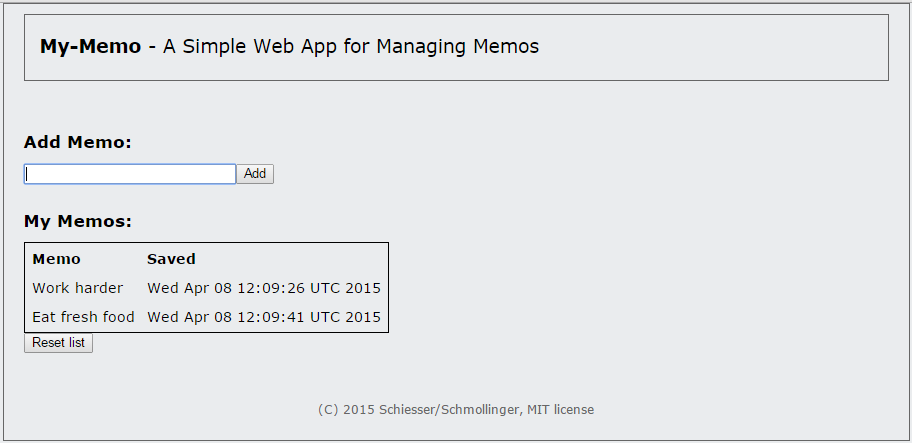 Fig. 5-2 Screenshot of the JSF-rendered memos view in the browser.
5.5 Further Improvements
The functionality and design of the application is complete with some restrictions. At the moment, it is possible to enter an empty string as a valid memo. No error message appears in this case. Concerning the user interface, the inline label of the textfield is missing. Further, we want to learn more about the scopes of JSF Managed Beans in order to discuss if the session scope is adequate or not.5.5.1 Validation
As part of the JSF core component library, JSF provides a mechanism to validate input data and to render error messages in case of invalidity. We want to sketch this feature for the textfield with the IDmemo.
<h:inputText id="memo" size="30" value="#{memoController.memo.description}" validatorMessage="Please, enter a memo!">
	<f:validateRequired />
</h:inputText>

<h:commandButton value="Add" actionListener="#{memoController.doAdd}" />
<h:message for="memo" style="color: red;" />
The code snippet shows that special validation tags can be embedded within the opening and closing tag of an input component, here a textfield. In this case, we use the tag <f:validateRequired> that demands an input value for the textfield. If nothing is entered into the textfield and a request is started by clicking on the command button, the validation will fail. The server does not execute the action listener method but renders the view containing error messages. Customized error messages can be defined by using the attribute validatorMessage of the respective input component. If no individual message is given, the system uses localized default messages. Due to the <h:message> tag it is possible to place the message at an arbitrary position within the Facelet. We place it, as demanded earlier, directly behind the command button. The attribute for relates to the ID of the input component.
After updating the Facelet memos.xhtml as described, we can re-run our project and after a click on the provided link (e.g. http://runner20.codenvycorp.com:64433), we should get the content presented in Fig. 5-3.
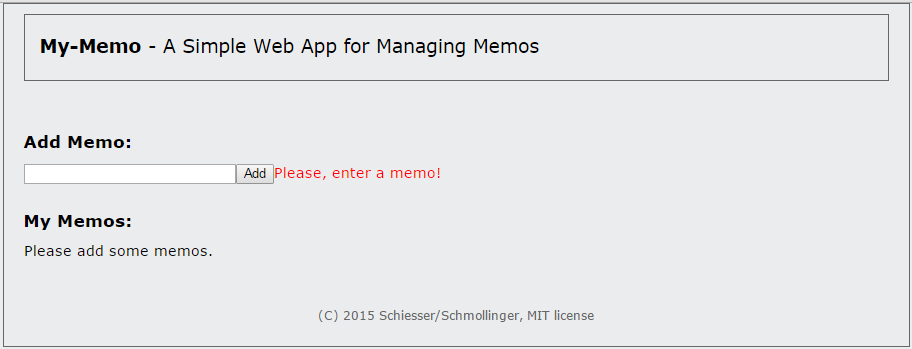 Fig. 5-3 Screenshot of the rendered memos view containing an error message in the browser.
5.5.2 HTML 5 friendly
In HTML5, input elements have a new attributeplaceholder. This attribute can be used to place text in the input field in gray until the field receives focus. This enables the implementation of very simple inline labels: labels of input fields that are not located over or before the respective field but are contained within the field itself. This is useful in that it allows us to provide informational texts for filling out an input field.
Unfortunately, the attribute placeholder does not exist for JSF components like <h:inputText>. But with the help of JSF's pass-through mechanism, it is possible to use these new HTML5 attributes anyway. The idea is to define an attribute and its value with a special JSF tag called <f:passThroughAttribute> within the respective JSF component. During the JSF rendering phase, attributes defined in this way are emdedded directly in the resulting HTML code. In the following, we use this mechanism to realize inline labels for our textfield as follows:
<h:inputText id="memo" size="30" value="#{memoController.memo.description}" validatorMessage="Please, enter a memo!">
	<f:passThroughAttribute name="placeholder" value="Enter your memo here" />
	<f:validateRequired />
</h:inputText>
After updating the Facelet memos.xhtml as described, we can re-run our project and after a click on the provided link (e.g. http://runner20.codenvycorp.com:64433), we should get the content presented in Fig. 5-4.
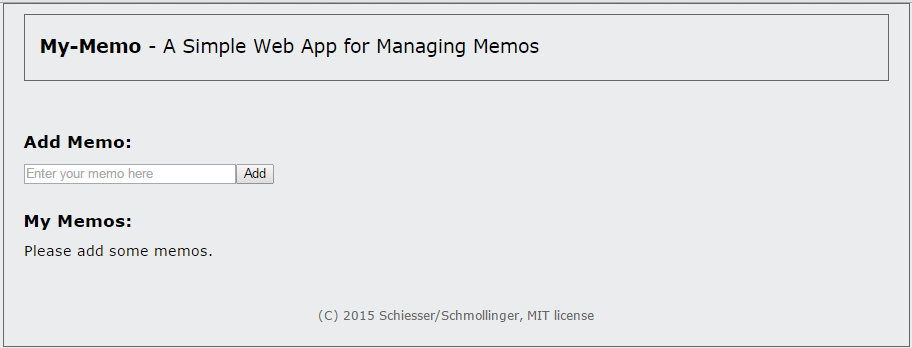 Fig. 5-4 Screenshot of the JSF-rendered memos view with a textfield containing an inline label.
5.5.3 More Scopes
In Section 5.3, we described the annotation@SessionScoped. JSF provides further scopes for Managed Beans. In order to develop a performant web application, we should store data only as long as necessary and as short as possible on the server. Storing everything in the session without necessity can lead to serious memory loads if several thousand users work with the application at the same time. Analyzing the situation often shows that some data is only necessary as long as a user works with the same view or that data is only needed during one request. Tab. 5-1 shows the most important scopes for JSF Managed Beans.
| Scope | Description |
| @ApplicationScoped | The bean is provided as long as the application is deployed to the server. |
| @SessionScoped | Beans are stored in the user session and deleted if the session gets invalid. |
| @ViewScoped | Beans are provided by the server as long as the user works with the same view. |
| @RequestScoped | The bean and its data is created and destroyed during one http request. |
MemoController to the view scope (@ViewScoped). Before trying so, please open the application in two tabs of the same browser. Add some memos to the list. Since both views use the same session they both work with the same Managed Bean. The data is shared between the tabs. Now, change the scope to @ViewScoped and restart the application. Opening the application in two tabs of the browser again shows the different behavior. Each tab is regarded as a separate view and works on its own Managed Bean, i.e. data is not shared anymore between the tabs!
While view scoped data is deleted immediately after closing the view, session scoped data is still active unless the session gets a timeout. Assuming that a lot of users work with the application in parallel, a lot more memory is necessary over time for storing the data in the session. Nevertheless, please use the session scope for the bean MemoController again. We will revisit this discussion in the last chapter again.
In the next chapter, we will revise our software architecture and introduce another important Java EE component technology called Enterprise Java Beans (EJB).
5.4 Further Reading
If you you want to deep dive into JSF, here you will find some current textbooks about the technology. Anghel Leonard, 2014. Mastering JavaServer Faces 2.2. Edition. Packt Publishing - ebooks AccountDiscussion
Use the message board below to give the authors your feedback or to discuss this page's topic with other readers (in English please!). Please don't expect the authors to answer directly, but they might update the content of this site according to your feedback.- Remember, if you sign up to Codenvy, you will be able to persist the project in your workspace. This enables you to store intermediate states of your project, and by that, to make a break when ever you like. Otherwise, all your changes are volatile and will be lost after closing the browser. ↵
- Codenvy does not provide a special menu item for Facelets. Please use the general menu item for file creation (New → File).↵
- Other JSF components provide the functionality to contain a certain value, e.g. a textfield contains a certain text. If the value of these components changes, an event of type ValueChangedEvent is fired. Methods registered to such components must define this type as a formal parameter instead of an ActionEvent and are called value changed listeners.↵