In this chapter you will learn how to start an application with our cloud IDE Codenvy and you will serve an HTML mockup of our application using the embedded WildFly application server.
2.1 Starting the Application
For running the application we are using the WildFly application server. To simplify development we provide a preconfigured server (Docker image) inside of Codenvy. If you’re not familiar with this cloud IDE yet, you can read their user guide first.
As you might have guessed, all the changes you are doing in the cloud IDE are volatile and will be lost after closing the browser. If you want, you can sign up to Codenvy which allows you to persist the project in your own dedicated workspace. If you don’t want to sign up, don’t worry: throughout the book we provide links that allow you to start an IDE in the needed state.
In the following steps we will start the application server from inside the IDE. Firstly start the cloud IDE by clicking the following link:
Start Cloud IDE
After a while you will see the IDE with a project tree on the left side. There you’ll find the project structure that we already set up for you. Besides the folder structure, you’ll find the file pom.xml in the root folder. It is the configuration file for Maven, the build system we are using. Don’t bother about it, we won’t go into any detail about the file – just think of it as a black box that takes care of the building of our project.
To start the application server, we’ll click on the ‘Run‘ submenu you’ll find under the main menu ‘Run’. In the console log in the bottom part of the screen you will see the log entries of the server. After starting up our server the cloud IDE will deploy our application, which consists of an empty WAR file[1] (short for web archive) for the time being.
After the deployment in the console log, you will find a blue colored link labeled with “Application:” as shown in Figure 2-1. Press this link to start the deployed application. Please memorize this procedure as you’ll repeat it a lot of times throughout this book.
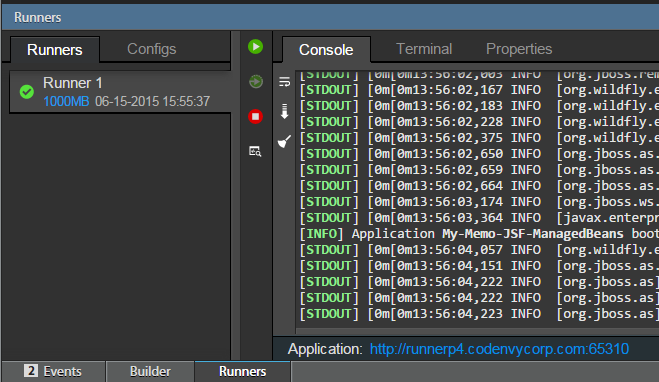
Fig. 2-1 Screen shot of the application starting link
As the application doesn’t contain any valid content yet, we will just see a white screen with the text ‘Forbidden‘. We will change that in the next section, by adding an HTML file that will be served by the application server.
2.2 Serving a HTML File
Listing 2-1 shows the HTML file that we want to serve. We assume the reader knows HTML, so we won’t go into detail. For a good introduction to HTML go to w3schools.
<!DOCTYPE html>
<html>
<head>
    <meta charset="UTF-8">
    <title>My-Memo</title>
    <link rel="stylesheet" type="text/css" href="screen.css">
</head>
<body>
<div id="container">
    <div id="header">
        <p>
            <b>My-Memo</b> – A Simple Web App for Managing Memos
        </p>
    </div>
    <div id="content">
        <h1>Add Memo:</h1>

        <form method="POST" action="">
            <input type="text" name="memo" size="30"
                   placeholder="Enter your memo here"/>
            <button type="submit" id="save">Add</button>

            <h1>My Memos:</h1>
            <table>
                <tr>
                    <th>Memo</th>
                    <th>Saved</th>
                </tr>
                <tr>
                    <td>Repair car</td>
                    <td>12:00 2014-11-12</td>
                </tr>
                <tr>
                    <td>Play cards</td>
                    <td>13:13 2014-11-13</td>
                </tr>
            </table>
            <br/>
            <button type="submit">Reset list</button>
        </form>
    </div>
    <div id="footer">
        <p>(C) 2015 Schiesser/Schmollinger, MIT license</p>
    </div>
</div>
</body>
</html>
Listing 2-1 HTML file index.html – Static HTML file to be served
The file contains a text field for entering our memo and a HTML table which renders all saved memos with their creation timestamp. Furthermore, there are two action buttons, one for adding a new memo and a second one for resetting the list, which will delete all previously entered memos.
Note that the file is a purely static HTML file with no functionality provided by any JavaScript. Currently, we just want to show how to serve a static HTML file in this chapter. Later on we will add functionality step by step .
Copy the file in the path src/main/webapp under the name index.html. For this you have to create the webapp folder first. The folder structure is mandatory by the used build system Maven. Files that you want to be served by the web server must be located in the webapp folder.
As you might have noted, the HTML file references the CSS file screen.css in the header via the link tag. This is our stylesheet, which we will be adding in the following section.
2.3 Adding some Style
Unfortunately for us web developers, pure HTML looks rather ugly. For this reason CSS (Cascading Style Sheets) exists to add styling for HTML elements. Using CSS, HTML elements are selected by so called CSS selectors. Style attributes are then defined for each of these CSS selectors. Again, we won’t go into any detail. If you don’t know any CSS, take a look at w3schools. Also please don’t judge the authors for the extremely bad styling. We are fully aware of the fact that we are not great web designers.
You can find the content of the used CSS file in Listing 2-2. Save this again in the src/main/webapp folder under the name screen.css. Note that the HTML file references this name in the link tag (see Listing 2-1).
@CHARSET "UTF-8";
body {
    margin: 0;
    padding: 0;
    background-color: #EAECEE;
    font-family: Verdana, sans-serif;
    font-size: 0.9em;
}
#container {
    margin: 0 auto;
    padding: 0 20px 10px 20px;
    border: 1px solid #666666;
    width: 865px;
    padding-top: 10px;
}
#header {
    font-size: 1.3em;
    border: 1px solid #666666;
    background: #EAECEE;
    padding: 0 15px 5px 15px;
    margin-bottom: 50px;
}
#footer {
    clear: both;
    text-align: center;
    color: #666666;
    font-size: 0.85em;
    padding: 3em 0 0 0;
}
h1 {
    font-size: 1.2em;
    margin-top: 1.5em;
}
table {
    border: 1px solid black;
}
table th,
table td {
    padding: 5px;
    text-align: left;
}
Listing 2-2 CSS file screen.css – CSS stylesheet for the application
2.4 Restarting the Web Application
Now we have everything ready to deploy to the application again and see the served HTML file in the web browser of our choice. If your server is still running, you must stop it and start it again using the respective buttons. Otherwise, if the server was shut down due to a timeout, you best use the ‘Re-run application …’ button. After that, you should see the content of the rendered HTML as in Figure 2-2.
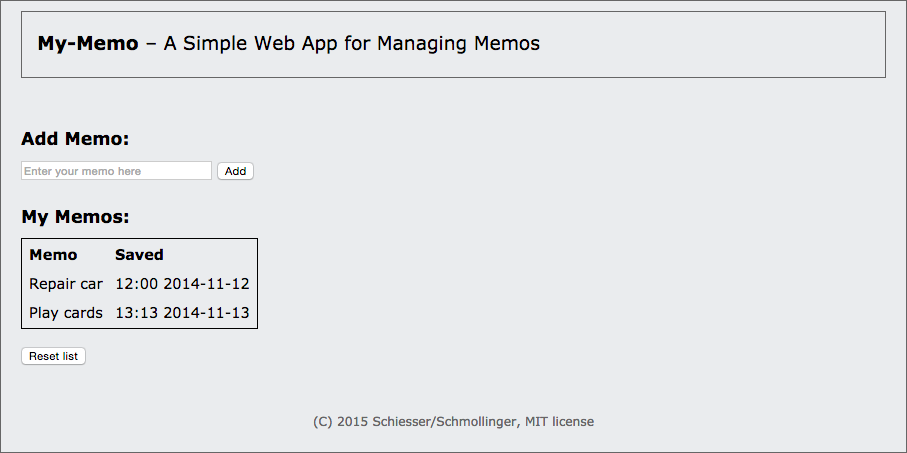
Fig. 2-2 Screenshot of the rendered HTML
In the next chapter, we will add the intended functionality of the application by using the server-side Java Servlet technology.
2.5 Further Reading
In the following, you will find some textbooks that go into detail of the main aspects of this chapter. The books are mainly about HTML and CSS, but also about the application server WildFly and Docker. The latter is used internally by Codenvy for realizing arbitrary runners in a project and is an emerging technology for deploying microservices.
Jon Duckett, 2011. HTML and CSS: Design and Build Websites. 1 Edition. Wiley.
Anne Boehm, 2015. Murach’s HTML5 and CSS3, 3rd Edition. 3 Edition. Mike Murach & Associates.
Luigi Fugaro, 2015. WildFly Cookbook. Edition. Packt Publishing – ebooks Account. (contains a chapter about docker, too)
Karl Matthias, 2015. Docker: Up & Running. 1 Edition. O’Reilly Media.
Discussion
Use the message board below to give the authors your feedback or to discuss this page’s topic with other readers (in English please!). Please don’t expect the authors to answer directly, but they might update the content of this site according to your feedback.
- We're linking here to the old Java EE 6 tutorial as we think the explanation for WAR files is better there than in the newer Java EE 7 tutorial ↵