In this chapter you will learn how Java classes process HTTP requests and create responses for the browser using Servlet technology.
Before we start, please verify again that your project is accessible in Codenvy and is up to date, i.e. you finished the previous chapters successfully as described. If this is not the case you can follow the preceding factory link that generates a project environment for you[1].
Project after chapter 2 (Static HTML)
3.1 Our first Servlet
It’s time to add some functionality to our still boring static HTML file. We’ll be doing so by using so called Java Servlets. Servlets were introduced 1997 and are a very low-level technology similar to plain PHP. Using Servlets, we write methods to directly handle HTTP requests. For each type of request (e.g. GET or POST) there will be a dedicated method to handle the request.
Let’s take a look at the signature of such a method for handling a GET request (consequently it will be called doGet):
protected void doGet(HttpServletRequest request, HttpServletResponse response) throws ServletException, IOException
This method is called by the Servlet framework – you’ll never call it explicitly in your code. The framework provides two objects for us: HttpServletRequest and HttpServletResponse. As you might have guessed, the former one is a representation of the HTTP request whereas the later one represents the response.
Let’s try that out. Before starting we’re creating the package press.turngeek.mymemo.controller inside our src/main/java folder.
In that newly created package, we’re adding the class MemoServlet as shown in Listing 3-1.
package press.turngeek.mymemo.controller;

import java.io.IOException;

import javax.servlet.ServletConfig;
import javax.servlet.ServletException;
import javax.servlet.annotation.WebServlet;
import javax.servlet.http.HttpServlet;
import javax.servlet.http.HttpServletRequest;
import javax.servlet.http.HttpServletResponse;
import javax.servlet.http.HttpSession;

@WebServlet({"/MemoServlet", "/memos"})
public class MemoServlet extends HttpServlet {

    private static final long serialVersionUID = -7843898075264520941L;
    private ServletConfig config;

    @Override
    public void init(ServletConfig config) throws ServletException {
        this.config = config;
    }

    protected void doGet(HttpServletRequest request, HttpServletResponse response) throws ServletException, IOException {
        sendResponse(request, response);
    }

    private void sendResponse(HttpServletRequest request, HttpServletResponse response) throws IOException {
        response.setContentType("text/html");
        response.setCharacterEncoding("utf-8");
        response.getOutputStream().print("Hello World.");
    }

}
Listing 3-1 MemoServlet class – Our first Hello world servlet
As you can see, we are delegating the two objects to a similar method named sendResponse. The simple reason is that we are later going to use this method for POST requests in the yet to be written method doPost, too.
In the method sendResponse, we’re just modifying the HTTP response object – so far we’re not touching the request object. That’s sufficient for our test, as we just want to generate some output – no matter what request was sent by the client.
In the method we’re setting the content type to be HTML and define that our output will be encoded using UTF-8 (highly recommended). Lastly, we’re using the ServletOutputStream provided by the response object, to print out the infamous Hello World string.
If we now restart our project, we’re still seeing the old static HTML file. The reason is that our Servlet only listens to the URLs /memos or /MemoServlet. Therefore, we have to add this suffix to the runner’s URL (e.g. http://runner22.codenvycorp.com:59635/memos).
Doing so, your web browser should display our greeting message. We’ll simplify this later. For now, we continue with adding a model for storing the memo data.
3.2 Adding the Model
In web applications the so called MVC (Model-View-Controller) pattern is very popular. As you might know, it is generally a common practice to separate concerns in software development, where this pattern is a good example of.
Basically, we divide the application code into three parts called model, view and controller. The model is the part that takes care of storing the data. Step by step, we will also come to the other parts. Let’s focus on the model for the time being.
As the data of our application consists of memos, we therefore need an abstraction to store the data of a memo. The class Memo you can find in Listing 3-2 fulfills this job. It’s a simple JavaBean that contains two properties: description for storing the memo’s text and created to save the creation timestamp of a memo.
Please create now the new package press.turngeek.mymemo.model and save this class under the name Memo in it.
package press.turngeek.mymemo.model;

import java.util.Date;
import java.io.Serializable;

public class Memo implements Serializable {

    private static final long serialVersionUID = -57892374598329L;

    private String description;
    private Date created;


    public String getDescription() {
        return description;
    }

    public void setDescription(String description) {
        this.description = description;
    }

    public Date getCreated() {
        return created;
    }

    public void setCreated(Date created) {
        this.created = created;
    }

}
Listing 3-2 Memo class – The model class of our application
Note that our model class is implementing the Serializable interface and therefore, as a matter of good practice, also provides a serialVersionUID constant. Objects using this interface can be serialized in a stream of bytes and therefore be saved on the file system. This is necessary as we later want to store the model in the user’s session. As there can be thousands of user sessions, the application server can not keep every one in memory. Data that we want to store in the user’s session must therefore be serializable.
Introducing the model class, didn’t bring any new functionality so far to our application, that’s why we’re about to add the view in the next step.
3.3 Adding the View
Right now our servlet is just outputting a rather boring ‘Hello World’ text. In this step, we’re about to change that: we’ll add a class that dynamically renders HTML code similar to our existing index.html file.
Listing 3-3 shows the implementation of that class that we call MemoViewRenderer as its purpose is to render the view. Please save that class in a newly to be created package called press.turngeek.mymemo.view. The class uses our model class Memo introduced in the previous section.
Memo, immediately. In this case, please rebuild the project manually (menu item Build → Build) and update the dependencies of the project (menu item Build → Update Dependencies). After a short while the red error messages will disappear. This workaround will help in similar situations throughout the book.package press.turngeek.mymemo.view;
import java.util.List;
import press.turngeek.mymemo.model.Memo;
public class MemoViewRenderer {
public static String renderResponse(List<Memo> memos, String err) {
String part1 =
"<!DOCTYPE html>" + "<html>" + "<head>" + "<meta charset=\"UTF-8\">" + "<title>My-Memo</title>"
+ "<link rel=\"stylesheet\" type=\"text/css\" href=\"screen.css\">" + "</head>" + "<body>"
+ "<div id=\"container\">" + "<div id=\"header\">"
+ "<p><b>My-Memo</b> - A Simple Web App for Managing Memos</p>" + "</div>" + "<div id=\"content\">"
+ "<h1>Add Memo:</h1>" + "<form method=\"POST\" action=\"\">"
+ "<input type=\"text\" name=\"memo\" size=\"30\" placeholder=\"Enter your memo here\" />"
+ "<button type=\"submit\" name=\"button\" value=\"save\">Add</button>";
StringBuilder output = new StringBuilder(part1);
if (err != null) {
System.out.println("err=" + err);
output.append("<span style=\"color:red\">" + err + "</span>");
}
String part2 = "<h1>My Memos:</h1>";
output.append(part2).append(renderTable(memos));
String part3 =
"</form>" + "</div>" + "<div id=\"footer\">" + "<p>(C) 2015 Schiesser/Schmollinger, MIT Licence</p>" + "</div>"
+ "</body>" + "</html>";
output.append(part3);
return output.toString();
}
private static String renderTable(List<Memo> memos) {
StringBuilder table = new StringBuilder();
if (memos.size() == 0) {
table.append("<p>Please add some memos.</p>");
} else {
table.append("<table><tr><th>Memo</th><th>Saved</th></tr>");
for (Memo memo : memos) {
table.append("<tr><td>").append(memo.getDescription()).append("</td>");
table.append("<td>").append(memo.getCreated()).append("</td></tr>");
}
table.append("</table><br/><button type=\"submit\" name=\"button\" value=\"reset\">Reset list</button>");
}
return table.toString();
}
}
Listing 3-3 MemoViewRenderer class – renders the view of our application
Let’s have a look at this class step by step. The class is just providing a static helper method[2] called renderResponse which takes care of rendering the whole page of the application. The method is called with two parameters: memos which is the list of the Memo objects to be displayed and err which is an optional error message. If we don’t expect any errors, we’ll just pass null.
The output is generated by the StringBuilder instance named output. It contains three parts whose string objects are consequently named part1, part2 and part3. The first part consists of the header and the HTML form containing the textfield to enter a new memo. The second part is about rendering Memo objects. Besides the header (h1 tag), its output is generated by a second private static method called renderTable. The last part, part3, just contains a footer with a copyright message.
If an error message is defined (err is not null), we also add a error message before the second part.
The method for rendering the list of memos (renderTable) is also using a StringBuilder. If there are no entries in the provided list, it will just generate the information message ‘Please add some memos’. If there are entries, it firstly generates an HTML table header. Secondly it is iterating over the list of Memo objects and appends, for each entry, an HTML table row. Lastly, a button with the label ‘Rest list’ is generated to let the user delete all memo entries.
As you can see, the code for this view renderer is hard to read and maintain: most of it contains constants of HTML strings that are better stored in a template file. This is the reason which has lead to JavaServer Pages (JSP), which are covered in more detail in chapter 4.
Please note that the generated HTML form contains two request parameters: memo and button. The former contains the newly to be added memo text, the later stores the name of the button which has been pressed: save or reset. We will use these parameters in the following section 3.4.
Now we have to integrate the renderer in our application. We will do this by modifying the sendResponse method of our MemoServlet:
private void sendResponse(HttpServletRequest request, HttpServletResponse response) throws IOException {
	response.setContentType("text/html");
	response.setCharacterEncoding("utf-8");
	response.getOutputStream().print(MemoViewRenderer.renderResponse(java.util.Collections.<Memo>emptyList(), null));
}
As you can see, we’re directly calling the renderResponse method of the MemoViewRenderer to generate the output. As parameters, we provide an empty list of Memo objects (java.util.Collections.emptyList()) and null as err parameter, as we don’t want to display any errors. [3].
If you restart the application and request the /memos URL, you should see the output as shown in Figure 3-1.
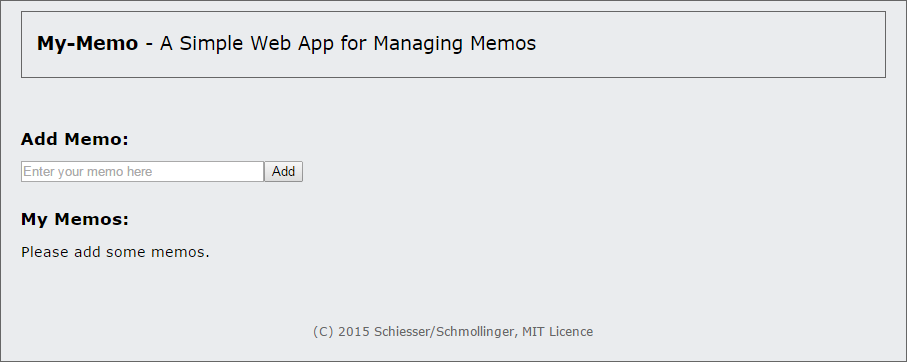
Fig. 3-1 Screenshot of the generated output of the MemoViewRenderer
It’s a little bit annoying that we have to add the /memos suffix each time to the application’s URL. Therefore, we are now changing the index.html file to do a redirect to /memos.
To do so, replace our index.html file with the content of Listing 3-4. The meta tag is doing the intended redirect.
<!DOCTYPE html>
<html>
	<meta http-equiv="refresh" content="0; URL=memos">
</html>
Listing 3-4 HTML file index.html – doing a redirect to MemoServlet
After restarting the application, you should directly see our application without having to type the /memos suffix.
Try now to press the ‘Add’ button. This will lead to the error message: ‘HTTP method POST is not supported by this URL’. The reason for this is that our servlet isn’t handling any POST requests, yet. We’ll change this in the following section.
3.4 Add a little bit more Action Please
In the last section, we received an error message when we were pressing an HTML button to perform an action. Reason for this was that we haven’t yet implemented some handlers to process this kind of activity. In Struts, a well-known framework to simplify servlet development, these handlers are called actions. From our point of view this kind of naming makes a lot of sense, therefore, we’re borrowing it here. Thanks.
We’re now about to implement such action handlers. But firstly, we have to implement some kind of dispatcher whose task is to find out which action was actually called.
To do so, we’re adding the following method to our MemoServlet class:
protected void doPost(HttpServletRequest request, HttpServletResponse response) throws ServletException, IOException {
    request.setCharacterEncoding("UTF-8");
    // get post parameter
    final String button = request.getParameter("button");
    switch (button) {
        case "reset":
            actionReset(request);
            sendResponse(request, response);
            break;
        case "save":
            actionAddMemo(request);
            sendResponse(request, response);
            break;
        default:
            // no action
            sendResponse(request, response);
    }
}
The doPost method is generally called by the servlet framework for each incoming POST request. Similar to the doGet method a request and a response object is passed.
In the method, firstly we’re setting the encoding of the POST request parameters to be UTF-8 which is generally a good practice.
Secondly, we are trying to find out which button the user actually pressed and, depending on this information, we’re about to invoke a different action method. As you can see in the HTML generated by our MemoViewRenderer class, we are encoding in the HTML request parameter button which button has been pressed. Consequently, we store this parameter’s value in the variable button. If its value is “reset” we call the actionReset method, if it’s “save” we instead invoke actionAddMemo. If it’s neither of those, we’re not performing any action. But in all three cases we make sure to render the response by delegating to the sendResponse method.
That way, we’re separating the dispatching of which action to call from the actual action handling. Once again separation of concerns is a good design principle.
Of course, we still have to implement the actual action handlers. We’re starting with the simple actionReset method for deleting all previously stored values. To do so, we firstly have to implement a helper method whose task is to retrieve the stored Memo objects from the user’s session.
Memo objects. Different user sessions can easily be emulated by accessing a web application from different browsers (e.g. Firefox, Chrome). Different techniques exist (e.g. cookies) to find out which user session an incoming request belongs to. We don’t go into any detail here, but they all have in common that for each session a unique ID for distinguishing is assigned, the so called session ID.Add now, the needed helper method for our MemoServlet class:
private List<Memo> getMemos(HttpServletRequest request) {
    HttpSession session = request.getSession();
    List<Memo> memos = (List<Memo>)session.getAttribute("memos");
    if (memos == null) {
        memos = new LinkedList<Memo>();
        session.setAttribute("memos", memos);
    }
    return memos;
}
As you can see, it firstly receives an HttpSession object which stores information about the session of the current user. The method takes advantage of the so called lazy initialization pattern. In our case that means, if we don’t find a list of Memo objects in the session’s attribute memos, we create a new LinkedList object for storing[4] them. After successfully creating it for the first time, we store it in the user’s session by calling the setAttribute method of the session object.
We can now use this method to implement the missing actionReset method:
private synchronized void actionReset(HttpServletRequest request) {
    List<Memo> memos = getMemos(request);
    memos.clear();
}
It’s implementation is straightforward: it just gets the list of Memo objects from the user’s session and removes all entries from the list by calling clear.
In contrast the actionAddMemo method is slighty more complicated:
private synchronized void actionAddMemo(HttpServletRequest request) {
    String memoDescr = request.getParameter("memo");
    if (memoDescr != null && !memoDescr.isEmpty()) {
        List<Memo> memos = getMemos(request);
        // create memo
        Memo memo = new Memo();
        memo.setDescription(memoDescr);
        memo.setCreated(new Date());
        // add todo list
        memos.add(memo);
    } else {
        //set error message in request
        request.setAttribute("err", "Please, enter a memo!");
    }
}
Here we’re firstly getting the value of the POST parameter memo which was sent by our HTML page. It contains the description of the memo we want to add.
If the client is actually sending a memo description, we are creating a new Memo object with the description sent and the actual creation timestamp. After that, we are adding this object to the list of the user’s Memo objects which we are retrieving by calling the getMemos helper method before.
In case the user is not providing any value for the memo (memoDescr is empty or null), we are setting an error message in the err attribute of the request.
This attribute we will use in the sendResponse method where we are rendering the HTML page.
Therefore we also have to update this method:
private void sendResponse(HttpServletRequest request, HttpServletResponse response) throws IOException {
    response.setContentType("text/html");
    response.setCharacterEncoding("utf-8");
    String err = (String)request.getAttribute("err");
    List<Memo> memos = getMemos(request);
    response.getOutputStream().print(MemoViewRenderer.renderResponse(memos, err));
}
Besides the err attribute we are also calling getMemos to retrieve the user’s memos. Both, a potential error message stored in variable err and the list of Memo objects are then sent to the MemoViewRenderer for updating the HTML page.
After doing so, we have finished the implementation of our MemoServlet. Your work should now look the same as shown in Listing 3-5. Please have a look – a common mistake is to forget necessary imports.
package press.turngeek.mymemo.controller;

import java.io.IOException;
import java.util.Date;
import java.util.LinkedList;
import java.util.List;

import javax.servlet.ServletConfig;
import javax.servlet.ServletException;
import javax.servlet.annotation.WebServlet;
import javax.servlet.http.HttpServlet;
import javax.servlet.http.HttpServletRequest;
import javax.servlet.http.HttpServletResponse;
import javax.servlet.http.HttpSession;

import press.turngeek.mymemo.model.Memo;
import press.turngeek.mymemo.view.MemoViewRenderer;

@WebServlet({"/MemoServlet", "/memos"})
public class MemoServlet extends HttpServlet {

    private static final long serialVersionUID = -7843898075264520941L;
    private ServletConfig config;

    @Override
    public void init(ServletConfig config) throws ServletException {
        this.config = config;
    }

    protected void doGet(HttpServletRequest request, HttpServletResponse response) throws ServletException, IOException {
        // no action
        sendResponse(request, response);
    }

    protected void doPost(HttpServletRequest request, HttpServletResponse response) throws ServletException, IOException {
        request.setCharacterEncoding("UTF-8");
        // get post parameter
        final String button = request.getParameter("button");
        switch (button) {
            case "reset":
                actionReset(request);
                sendResponse(request, response);
                break;
            case "save":
                actionAddMemo(request);
                sendResponse(request, response);
                break;
            default:
                // no action
                sendResponse(request, response);
        }
    }

    private synchronized void actionReset(HttpServletRequest request) {
        List<Memo> memos = getMemos(request);
        memos.clear();
    }

    private synchronized void actionAddMemo(HttpServletRequest request) {
        String memoDescr = request.getParameter("memo");
        if (memoDescr != null && !memoDescr.isEmpty()) {
            List<Memo> memos = getMemos(request);
            // create memo
            Memo memo = new Memo();
            memo.setDescription(memoDescr);
            memo.setCreated(new Date());
            // add todo list
            memos.add(memo);
        } else {
            //set error message in request
            request.setAttribute("err", "Please, enter a memo!");
        }
    }

    private void sendResponse(HttpServletRequest request, HttpServletResponse response) throws IOException {
        response.setContentType("text/html");
        response.setCharacterEncoding("utf-8");
        String err = (String)request.getAttribute("err");
        List<Memo> memos = getMemos(request);
        response.getOutputStream().print(MemoViewRenderer.renderResponse(memos, err));
    }

    private List<Memo> getMemos(HttpServletRequest request) {
        HttpSession session = request.getSession();
        List<Memo> memos = (List<Memo>)session.getAttribute("memos");
        if (memos == null) {
            memos = new LinkedList<Memo>();
            session.setAttribute("memos", memos);
        }
        return memos;
    }
}
Listing 3-5 MemoServlet class – updated implementation
Maybe you have noticed that we have added the synchronized keyword for each action method. We don’t want to go into too much detail on this, but the reason for this is to make our servlet thread-safe.
Generally there exists only one instance of the servlet class, but as for each HTTP request one thread is started, multiple HTTP requests lead to multiple threads running on this one instance.
These threads may access the same shared data: our user’s session storing the Memo objects. Therefore we have to synchronize the execution of our code – in our case it is a good idea to do this at the level of the action methods which are modifying the data. Read Write thread-safe servlets for further information to this topic.
You can now restart the application. It should be completely functional. If you encounter any error’s please compare your project state with the one of our Online IDE:
For the time being, the implementation of the MemoViewRenderer is rather ugly: it contains inline HTML code which should better be handled by some kind of template engine.0
In the next chapter we will take care of this issue by introducing a technology made for rendering views: JSP.
3.5 Further Reading
Current literature is never about Java Servlets alone. We already know the reason for this. Servlets are no longer used for rendering the view of an application. Instead, they are used behind the scenes of enterprise applications (e.g. for request analysis or filtering) and are building blocks of modern programming frameworks (e.g. JavaServer Faces). In the following chapters, we will introduce some of them and will refer to literature that does also contain current information about Java Servlet technology. Readers that are interested in the first years of the technology can refer to the following textbook:
Jason Hunter, 2001. Java Servlet Programming (Java Series). Second Edition Edition. O’Reilly Media.
Discussion
Use the message board below to give the authors your feedback or to discuss this page’s topic with other readers (in English please!). Please don’t expect the authors to answer directly, but they might update the content of this site according to your feedback.
- Remember, if you sign up to Codenvy, you will be able to persist the project in your workspace. This enables you to store intermediate states of your project, and by that, to make a break when ever you like. Otherwise, all your changes are volatile and will be lost after closing the browser. ↵
- The authors are aware that static helpers have their downsides, But it's just easier to implement it this way for our example ↵
- Please, don't forget the import statements in the servlet for the classes
MemoandMemoViewRenderer↵ - Please don't forget to add the imports for
java.util.LinkedList,java.util.Listandpress.turngeek.mymemo.model.Memo↵